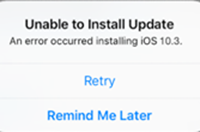
Android Data Recovery


Would you like to create a form in Word that others can fill out? It could be a questionnaire, sign-up form, quiz or other type of forms. If so, here is a general instruction on how to create a fillable form using Microsoft Word on your computer.
Not many people know that Microsoft offers Word users a simple form-creation tool because it is normally a hidden tab called Developer. So, the first thing you need to do before getting started is make the Developer tab visible on your main ribbon. Let’s run through the steps one by one now.
Step 1: Show the Developer tab
Click the File tab > select Options > click Customize Ribbon. Under the Customize the Ribbon section, select the Developer from the list and then click OK.
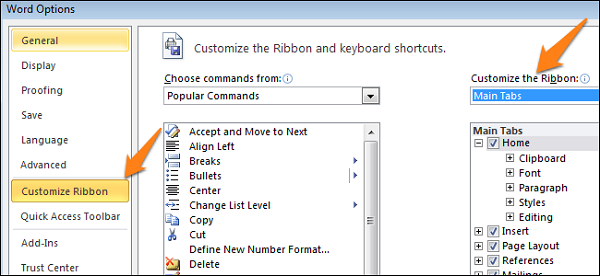
After that, you will see the Developer tab appear on the Ribbon.

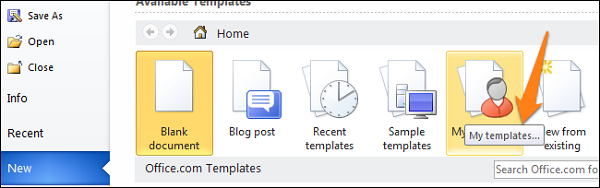
Step 2: Open a template or a document on which to base the form
- Start with a form template: You can choose a template that suits your needs from the premade templates available for download. Simply click the File tab > select New > type the type of form you want to create from the Search online templates box > press ENTER. After that, click the template that you want to use and select Create.
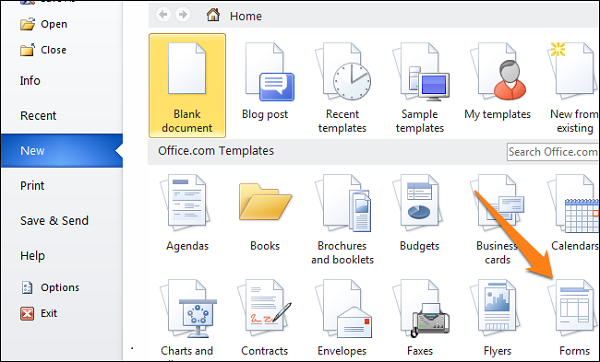
- Start with a blank template: Click the File tab > click New > select Blank document.
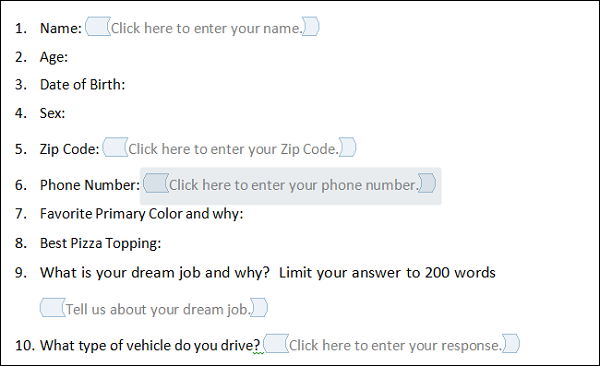
Step 3: Add content to the form
Now that you have made a template, you are ready to start adding information to the form. On the Developer tab, click Design Mode and the insert the controls that you want including text control, picture control, building block control, combo box or drop-down list, date picker, etc. For examples:

- Insert a text control: Click where you want to insert the control, and then click Rich Text Control (allows users to edit formatting) or Plan Text Content Control (only allows plain text without formatting) option.
- Insert a data Picker: Click where you would like to insert the data selection option and then click Data Picker Content Control under the Developer tab.

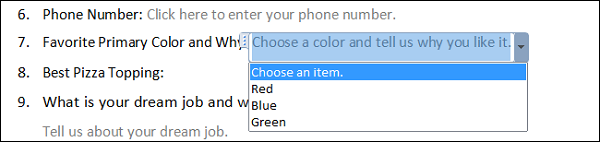
- Insert a drop-down list with options: On the Developer tab, select Combo Box Content Control or Drop-Down List Content Control > click Properties > select Add under Drop-Down List Properties > type a choice in the Display Name box. Repeat this step until all of the choices are in the drop-down list.
- Insert a check box: Click where you want to insert the check box control, and then click the Check Box Content Control to add the check box after each option. Repeat the process for any other questions that require one or more options.

Step 4: Disable the Design Mode and preview the form
Now you can disable the Design Mode to preview the form you’ve just created.

Now the form is almost done! If you want to limit how much others can edit or format a form, you can use the Restrict Editing command: go to Home > Select > Select All > click Developer > Restrict Editing. OK, you can save the document and send a copy to each person. After they fill it in they can just save it and send it back to you.