
Android Data Recovery


If you have already followed my previous tutorial such as how to restart page numbering in Word and find it useful, then don’t miss the coming up tutorials that I’m going to show you for the rest of the week. A series of tutorials about how to use Microsoft Word will be shared on our website.
For a Word document that contains more than fifteen pages, adding a Table of Contents can make it much easier for readers of the document to find the information needed. So our project today is creating a Table of Contents using Word’s built-in Table of Contents tool and Heading styles. It should work with Microsoft 2007, 2010 and 2013.
Step 1: Mark entries with built-in heading styles
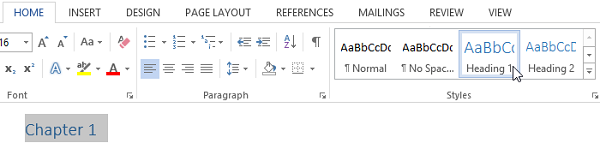
Open the word document, and select the heading or text to which you want to apply a heading style. After that, tap Home > locate the Style section > click the style like Heading 1, Heading 2 in the Quick Style gallery.
Note: When the headings are set, you can go to View – Show – Navigation Pane to check if you have marked all entries with heading style. You can go to Home – Font to modify the text of the Table of Contents. When you have marked the entries for your Table of Contents, you are ready to build it.
Step 2: Create a Table of Contents
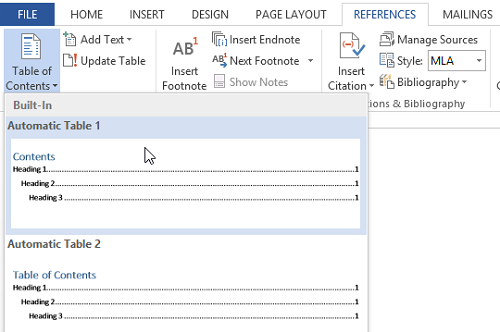
Click where you want to insert the Table of Contents and then go to References. Select Table of Contents command, then you will see a drop-down menu from which you can choose different table of contents styles. You can choose the Automatic Tables, Manual Table or Custom Table of Contents.
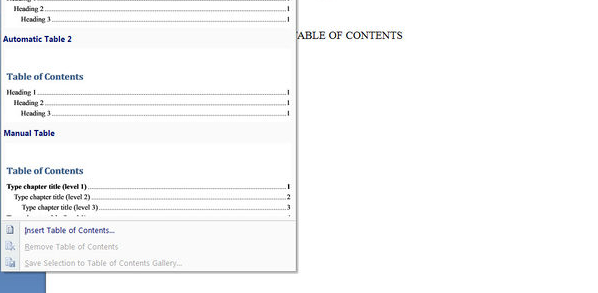
Note: All automatic Table of Contents include three headings by default, if you would like to use more headings or format the text in your Table of Contents, you can click Reference > Table of Contents > Custom Table of Contents > Modify or Formats from template to change the formatting of the text in the Table of Contents.
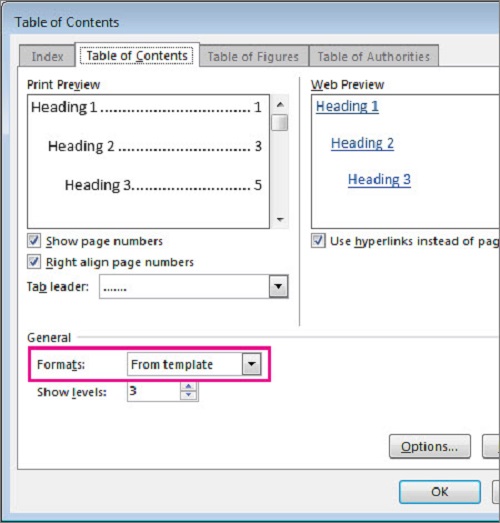
Or you can create your desired Table of Content with the Custom Table of Contents option. Go to References > click Table of Contents > tap Insert Table of Content. Then you will see a pop-up windows appear, click on Options to set up the level, heading or modify the style.
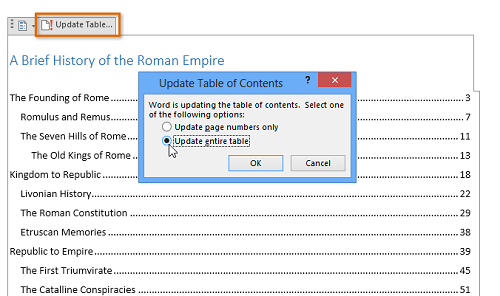
Step 3: Update the Table of Contents
If you added or removed headings or other Table of Contents in your document, you can update the Table of Contents easily.
Go to Reference > Select Update Table > Choose Update Entire Table in the pop-up box. Then the Table of Contents will be updated to the latest version.
Finally, don’t forget to take an overall look of your Table of Contents. Go to View – Show – click on Navigation Pane to take a preview. Is it easy for you to make a Table of Contents in Word? When it’s done, you can set a password to protect your Word document. Leave a comment below if you have any trouble making your Table of Contents.