Android Data Recovery


Many Android smartphone users prefer to brush their Android phones by themselves. It’s more convenient and totally for free. In the previous passage, we have introduced how to brush Android smartphone on your own. However, for some new users or even some frequently-brush-Android users, brush failure is common. The problem is that you failed upgrading your device and damaged Recovery program on your device, and your Android even can’t be opened any more.
Don’t worry. Here we are going to give you some tips to tackle with the brush failure trouble. Follow the steps below, and your Android phone will come back to life.
Step1: Install Android SDK on your PC
As your Android can’t be operated due to brush failure, go to Android SDK official website to download and install Android SDK on your PC.
Step2: Install Android USB Driver
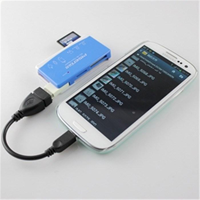
After installing Android SDK, connect your Android to the computer with the USB cable. Press “Power” button to turn on the phone, and then the PC will remind you to install Device Driver. Stop the automatically searching for Device Driver to install, choose to customize the Device Driver folder path, as Android SDK has been installed on your PC. The Device Driver will default to be in the “usb_driver” under “Android SDK” menu. So select “usb_driver” to install the Device Driver.
Step3: Download an Available Recovery Program
Recovery program is critical to the successful recovery of Android phone. With Recovery program, you can brush ROM once more, reinstalling OS on your Android. Many Android Recovery programs are available and here we recommend the common Clock Recovery. Save the downloaded Recovery program on the folder of your computer. For example, you can save it on c:\\recovery-RA-Magic-v2.3.1.img
Note: Recovery programs have different versions designed for different Android Types. Make sure you download the right version corresponding with your device.
Step4: Reinstall Recovery Program on your Android
Go to “Start” > “Operate” on your PC and enter “cmd”. Then enter “#adb devices”. If it shows up a string of serial number, your device has been successfully connected. Enter “cd” to navigate to Recovery program menu. Enter “*# adb reboot bootloader” and your phone will enter the fastboot mode. Now enter “#fastboot flash recovery-RA-Magic-v2.3.1.img” to install Recovery program on your Android phone. If you see the following instructions, the Recovery program has been installed on the device successfully.
fastboot flash recovery recovery-RA-Magic-v2.3.1.img
sending ‘recovery’ (4594 KB)… OKAY
writing ‘recovery’… OKAY
Now, you can unplug the USB cable, turn off the phone and check if your device can enter the Recovery mode. Yes, here your Android phone is back to your life. You can brush it again to install the OS. You can try this way when you are in the trouble of brush failure. You will find it no more disastrous if you failed brushing your Android and the system is damaged.