Android Data Recovery
Imagine if your friend comes to your room and browse your laptop and opens all the files which you should keep confidential. This could be so embarrassed. But good news is that Microsoft Word provides you with the password protection and permission feature that lets you lock and unlock a Word document. In this way, you are able to ensure the sensitive content are not altered or viewed by unauthorized people. In this tutorial you’ll learn how to protect Word document with password and permission.
Method 1: Making a document as Final
1. Open the desired Word document you would like to protect and then click on File > Info.
2. From the left column you will see a Protect Document option, click on it.
3. You will see a drop-down list provides you with five options, select Mark as Final.
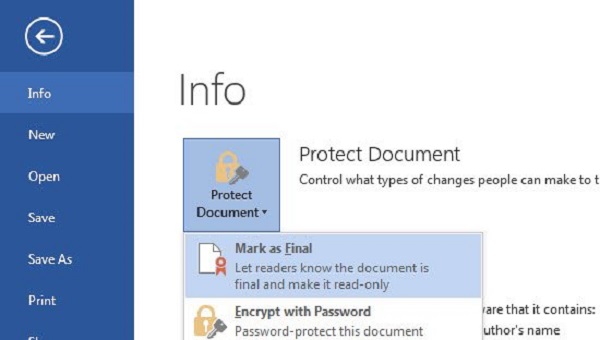
4. Then you will be ask to confirm that the document will be marked as final and then saved. Press OK to save your setting.
5. When it’s done, you will see a note appear at the top of the menu bar saying that you can edit the document again by clicking on the Edit Anyway button.
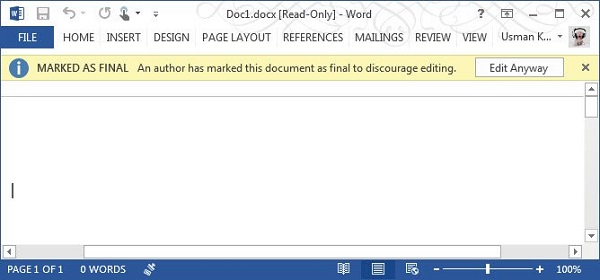
Note: You can also mark the document as read-only when you save it on the computer. Save the document on computer > Right click the document > Select Properties > Click on Read Only.
Method 2: Encrypt the document with a password
1. Open the document > go to File > Info > select Protect Document > click Encrypt with Password from the drop-down menu.
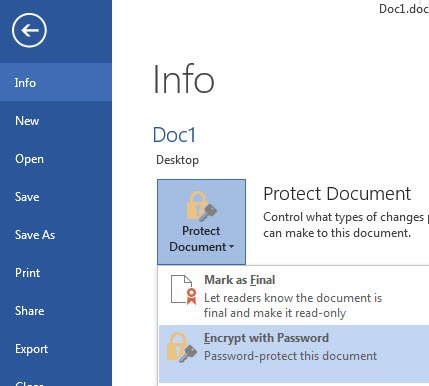
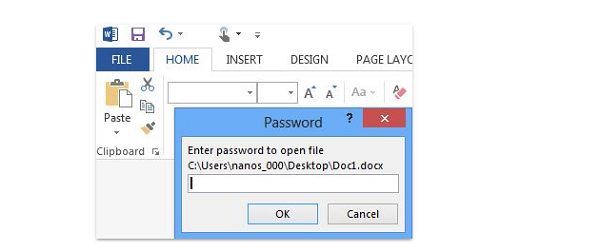
2. You will see a small window pop-up which asks you to enter a password to encrypt the contents of the file. Enter the password and then press OK.

3. You will need to re-type the password and press OK again. Now if you want to open the document, you will be asked to enter the password.
Method 3: Restricting formatting and editing in Word with a password
1. Open the document you want to restrict formatting and editing, and the click Review option.
2. Tap Restrict Editing in the Protect section.
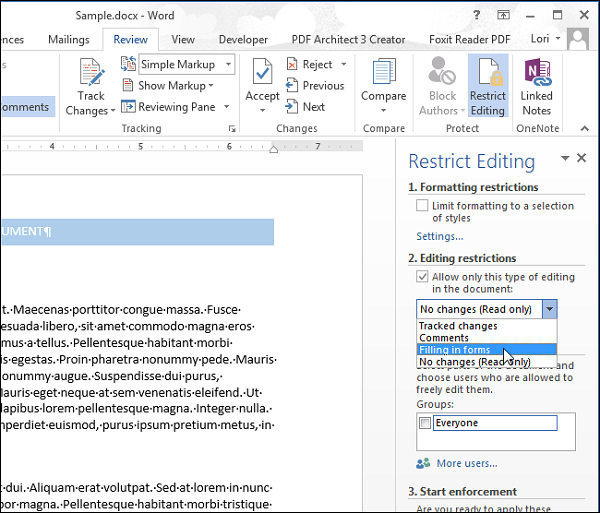
3. You will see the "Restrict Editing" pane display on the right side of the Word window. Select "Allow only this type of editing in the document" in the check box.
4. Select Filling in forms from the drop-down list.
5. Then click "Yes, Start Enforcing Protection" at the bottom of the pane.
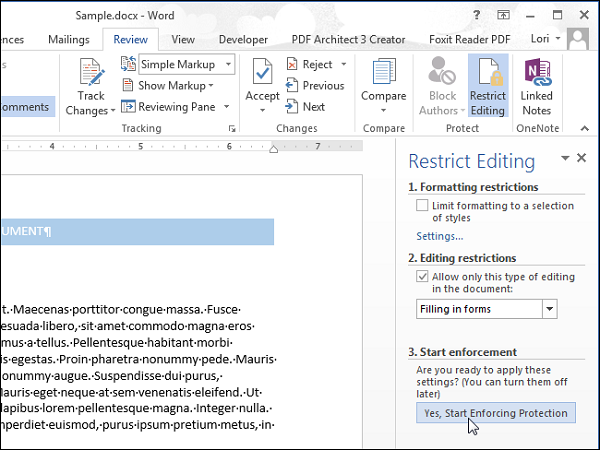
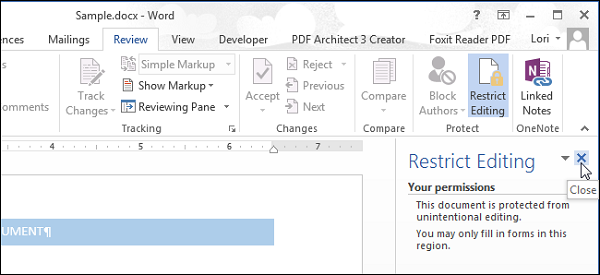
6. Enter and reenter a password in the "Start Enforcing Protection" dialog box and then click OK to finish the step. Now you can click the "X" button in the upper-right corner of the pane to close the "Restrict Editing" pane.
Although we can protect the Word document by creating a password, there’s risk too. If you fail to remember the password, Microsoft will be incapable of retrieving the lost or forgotten password. Therefore, be careful and you’d better keep a list of your password with the corresponding file name in somewhere safe.


