Android Data Recovery
"My friend Jane and I spend a wonderful vocation in Rome together. We went everywhere, Colosseum, Arco di Costantino, and more.And of course, we took a lot of photos. But some of them was shot from my iPhone 6 and some shot by Jane. She told me that I can put the photos on iCloud and share it with the app – iCloud Photo Sharing. But I have no idea how I can apply this. Any help?"
To share iPhone images with your friend, you can use iCloud Photo Sharing. And your friends who are added in the list can not only view the photos, but also add new pictures in it and leave comments.
Steps to Share iPhone Images with Your Friend
Step 1. Turn on iCloud Photo Sharing
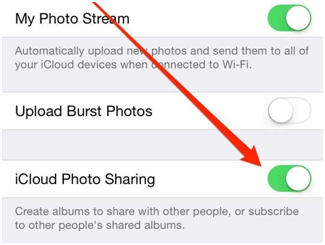
Make sure that the iCloud Photo Sharing option on your iPhone and your friends'.
If it is not turned on, please follow this: go to "Settings">"iCloud">"Photos"> turn on iCloud Photo Sharing.
Step 2. Go to the Shared Folder on Photos App
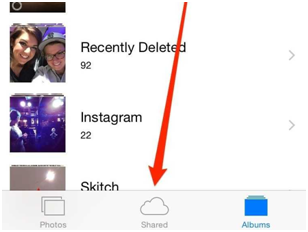
Go to the Photos interface on your iPhone, then, click "Shared" at the bottom of the interface. Like this:
Step 3. Add New Shared Photos Album
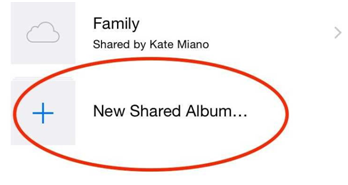
Click the "New Shared Album" which has a "+" sign.
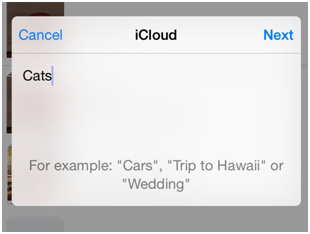
Then, name the new album and click "Next".
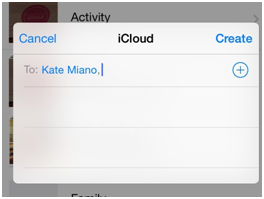
Step 4. Enter Your Friends Name
Here you are required to enter your friends' name which you want to share the pictures with. After setting this, you as well as your friends whose name was added to the shared album can access the album and see the photos and videos on their own iOS device.
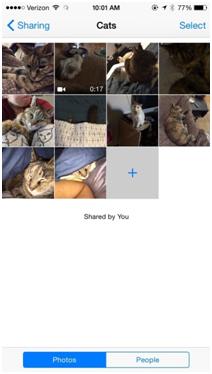
Note: If you want to deny people adding photos on the album you created, you can tap "People" with ease. Also, subscribers can only delete the photos he/she previously shared.
Well, as you see, it is that easy, isn't it? One more piece of good news is that the photos won't be counted into iCloud storage. And you can save more than 5,000 pictures and videos in each album. For more detail, you can check this iPhone Photo Sharing FAQ list.


